Rectangular to Polar Conversion
You should start with a canvas size of 250 wide by 150 high.
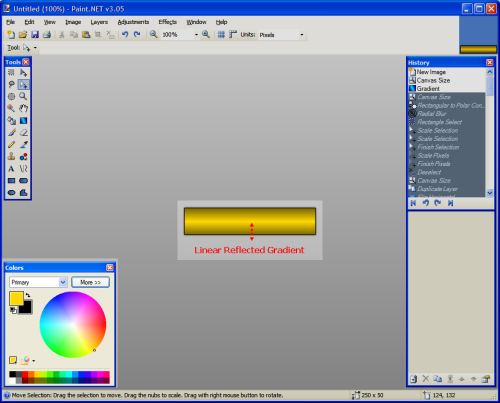
Set your Primary colour to one you would like your chain links to be; I chose a Yellow colour (as I want the chain to be kind-of gold). Set your Secondary colour to Black.
Draw a Gradient (Linear Reflected), using the left-mouse button, from the centre to the bottom of your canvas.
You should ensure that the angle of your Gradient is exactly 90.00 degrees, this will be important later.
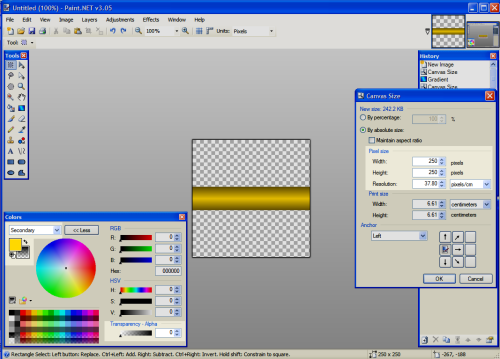
Set the Transparency Alpha of your Secondary Colour to 0.
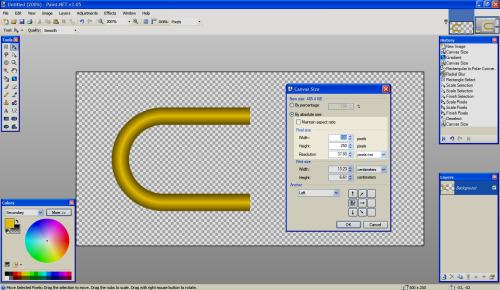
Adjust the canvas size: IMAGE > Canvas Size, to 250 x 250.
Ensure the Anchor is set to 'Middle' (I know the screenshot looks different).
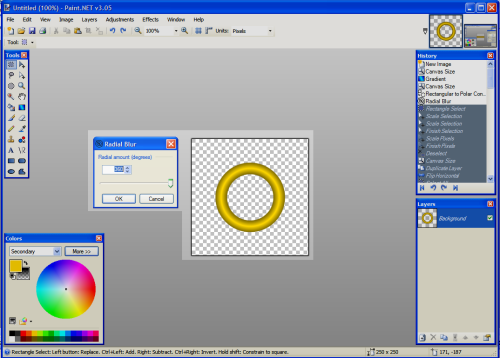
EFFECTS > Rectangular to Polar Conversion
EFFECTS > BLURS > Radial Blur: Radial Amount 360
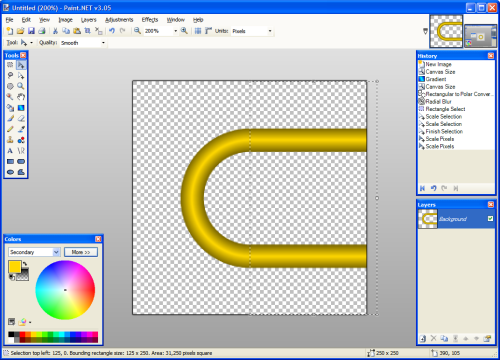
With the Rectangle Select tool highlight the entire right half of your canvas. The area selected should have a Bounding Rectangle size: 125 x 250, according to the info bar at the bottom of the screen.
I would advise for the next stage to zoom in to at least 200%
Use the Move Selection tool to and grab the right nub of your selected area. Contract the selected area until it is only 2 pixels wide.
Change to the Move Selected Pixels tool and, again grab the right nub of the selection. Now, drag the selection all the way to the right side of the canvas.
This is commonly known as the Pixel Drag Effect
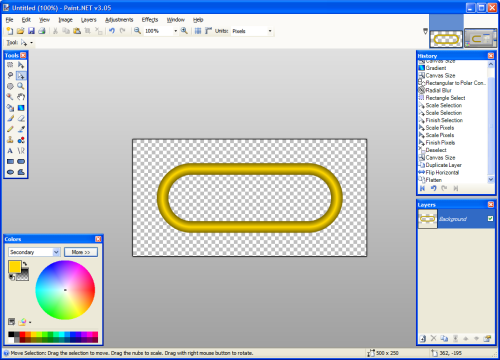
Adjust the size of your canvas again. This time make it 500 x 250, make sure (this time) that the Anchor position is now set to 'Left'.
Duplicate the background layer (CTRL+SHIFT+D). LAYERS > Flip Horizontal. Flatten the image (CTRL+SHIFT+F).
You now have the first link in your chain.
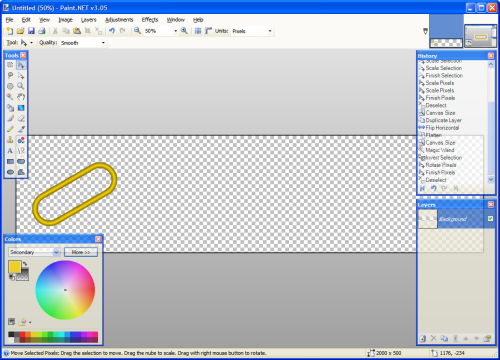
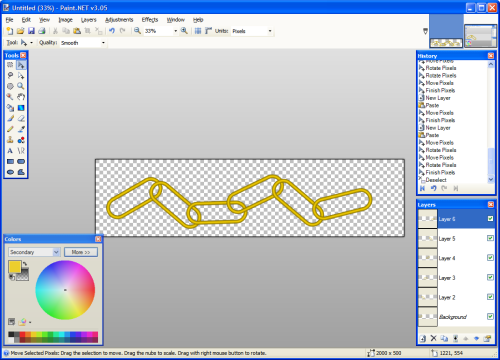
Adjust your canvas size again. This time to 2000 x 500
Use the Magic Wand with the tolerance set at about 25. Hold the SHIFT key and select in an area outside the link. CRTL+I to invert the selection. Use the Move Selection tool to rotate (right-click) the link to somewhere around 30.00 degrees.
With your link still selected, press CTRL+C to Copy and press CTRL+SHIFT+V to to paste a copy directly into a new layer.
Use the Move Selected Pixels tool to drag the link to the right, rotate and position it so that it overlaps the first link.
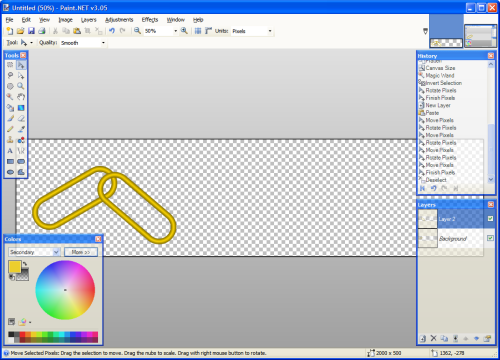
Press CTRL+SHIFT+V to paste another link directly into a new layer. Move this link into the desired position.
Repeat this process until you have a 6-Link chain, with each link on a different layer.
Go back and work on the Background Layer.
A) Use the Magic Wand, holding the SHIFT key and select the area outside the left-most link. CTRL+I to invert the selection. Now, choose Layer 2 and select the Eraser tool - set your brush-width to about 20.
B) You are going to erase a small section where the links overlap.
(Don't worry, the eraser will only rub-out what is inside your selection.)
It now looks like your second link is connected to your first.
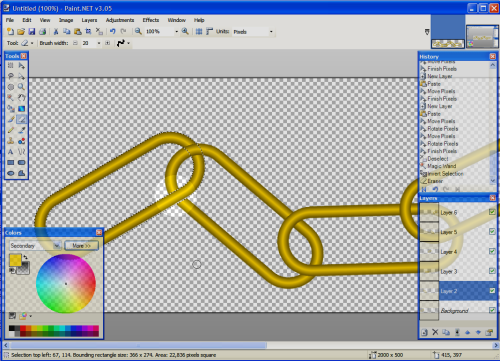
With Layer 2 still selected repeat steps A) & B) from previous instruction. Basically Magic Wand, Invert Selection, select Layer 3, Eraser.
Repeat these steps, working your way up through the layers until you have erased a joining section on each.
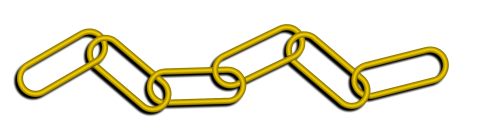
Flatten the image and your chain is basically finished.
You can add a Drop Shadow for effect. EFFECTS > Drop Shadow: X -10, Y - 10, Blur Radius 5.

No comments:
Post a Comment